Securit is a secure data safe that helps you store and organize sensitive information such as passwords, API keys, secure notes, and other data. Your data is encrypted using ECIES (Elliptic Curve Integrated Encryption Scheme) with your ECDSA private key, ensuring maximum security.
Strong Encryption
ECDSA cryptography protects your data with military-grade encryption
Tag Organization
Organize credentials with hierarchical tags for easy navigation
Cloud Sync
Store your encrypted safe on iCloud or other cloud file systems
Cross-Platform
Compatible with Windows I2Securit - use the same key and data file
2. Requirements
iOS 17.0 or later
iPhone or iPad
ECDSA private key file in PEM format
Passphrase for the private key
Note: You need to generate an ECDSA private key before using Securit for the first time. The next section explains how to do this using PuTTYgen.
3. Generate ECDSA Private Key (PuTTYgen)
Before using Securit, you need to generate an ECDSA private key. Follow these steps using PuTTYgen on Windows:
Install the complete package which includes PuTTYgen.
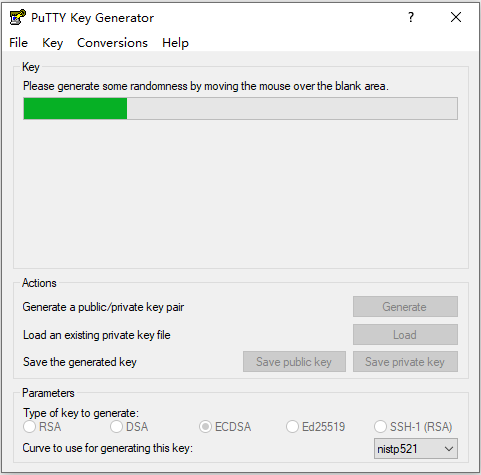
Launch PuTTYgen and Select ECDSA
Open PuTTYgen from the Start menu. At the bottom, select "ECDSA" and choose "nistp256" for the curve.
Select ECDSA with nistp256 curve, then click Generate
Generate the Key
Click the "Generate" button. Move your mouse randomly over the blank area to generate randomness for the key generation process.
Move your mouse to generate randomness
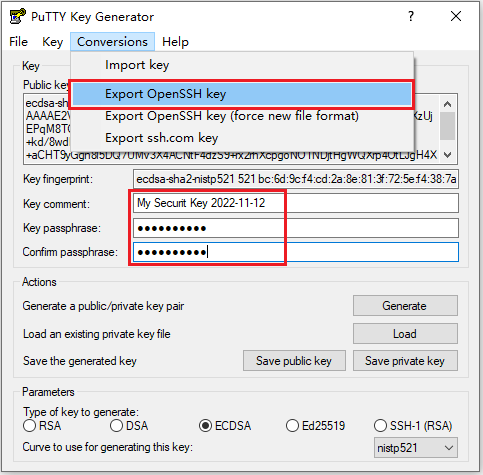
Set a Strong Passphrase
After the key is generated:
Enter a strong passphrase in the "Key passphrase" field
Confirm the passphrase in the "Confirm passphrase" field
Important: Remember this passphrase! You will need it every time you unlock Securit. If you forget it, you will lose access to all your encrypted data.
Export as OpenSSH Key (PEM Format)
Go to Conversions → Export OpenSSH key from the menu bar.
Save the file with a recognizable name like securit-key.pem
Export the key in OpenSSH format
Your private key is now ready! Store this .pem file to a USB stick, memory card, your iOS device, iCloud Drive, or any other media that can be accessed by your iPhone when you use Securit.
Security Tips:
Never share your private key file with anyone
Store a backup of your key in a secure location
Use a strong, unique passphrase (at least 12 characters)
Never forget the passphrase that protects your private key
Consider storing the key file on a USB stick or a memory card, and plug it to your iOS device for key access only when you are using Securit
4. First-Time Setup
Follow these steps to set up Securit for the first time:
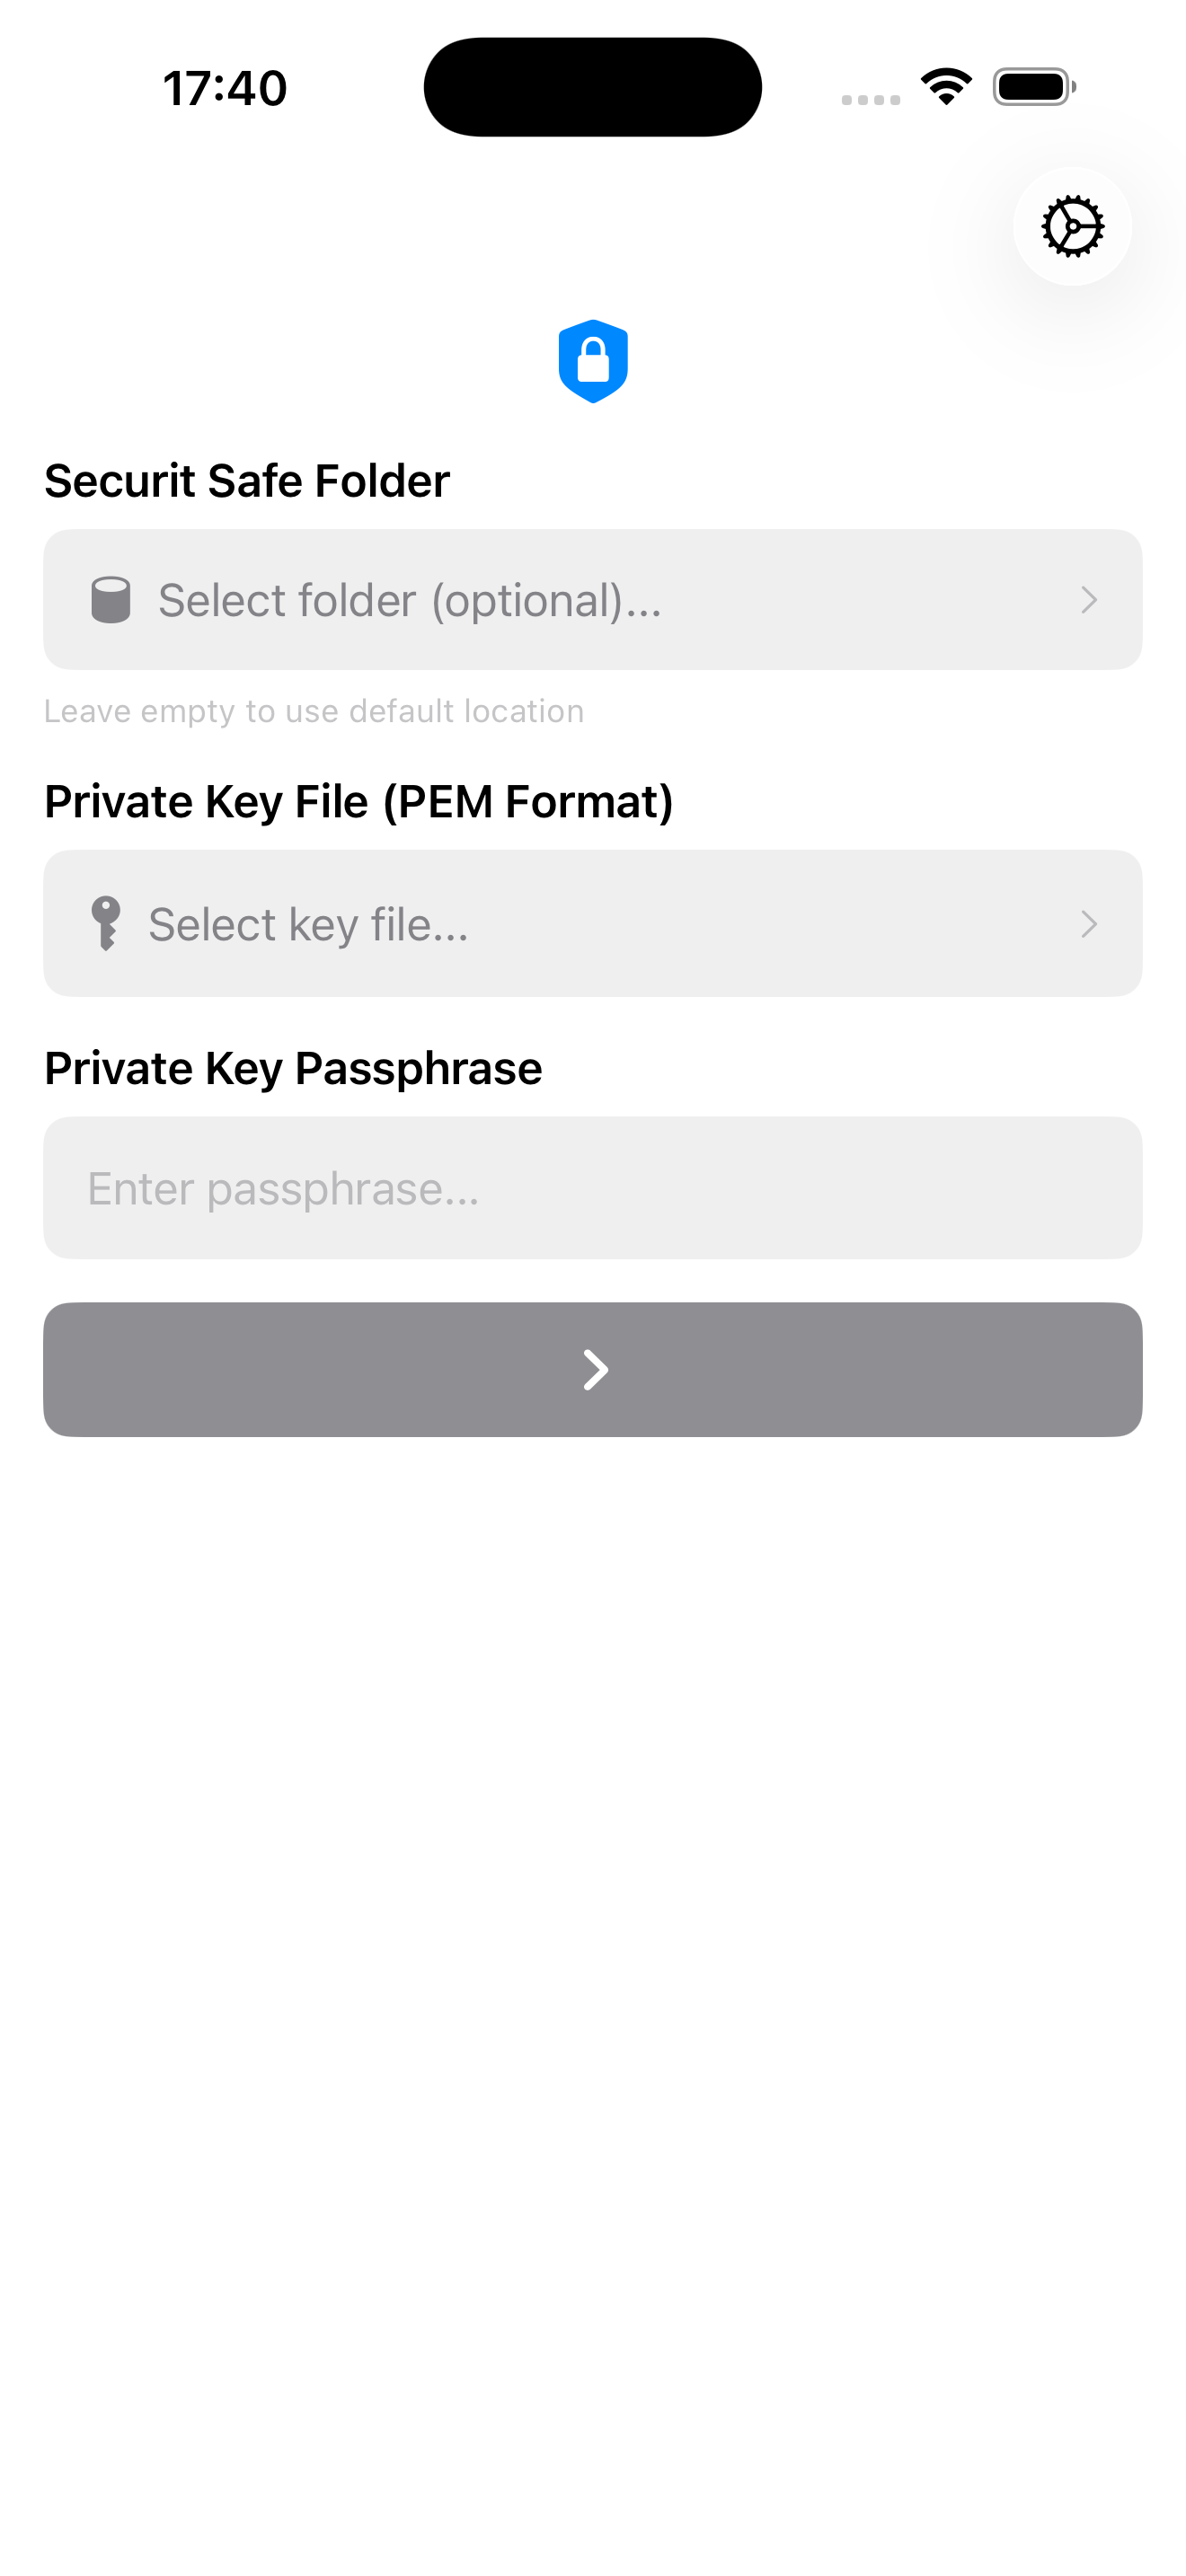
Launch Securit
Open the Securit app on your iOS device. You'll see the unlock screen.
Securit unlock screen
Select Your Safe Folder (Optional)
Tap "Select folder (optional)..." to choose where your encrypted data will be stored.
Select a folder for your encrypted safe
Leave empty: Data is stored in the app's default location
Select a folder: Choose a folder on local or external storage, or a folder on iCloud Drive or other cloud drives for syncing across devices
For cloud sync, select a folder in your preferred cloud storage service (iCloud Drive, etc.)
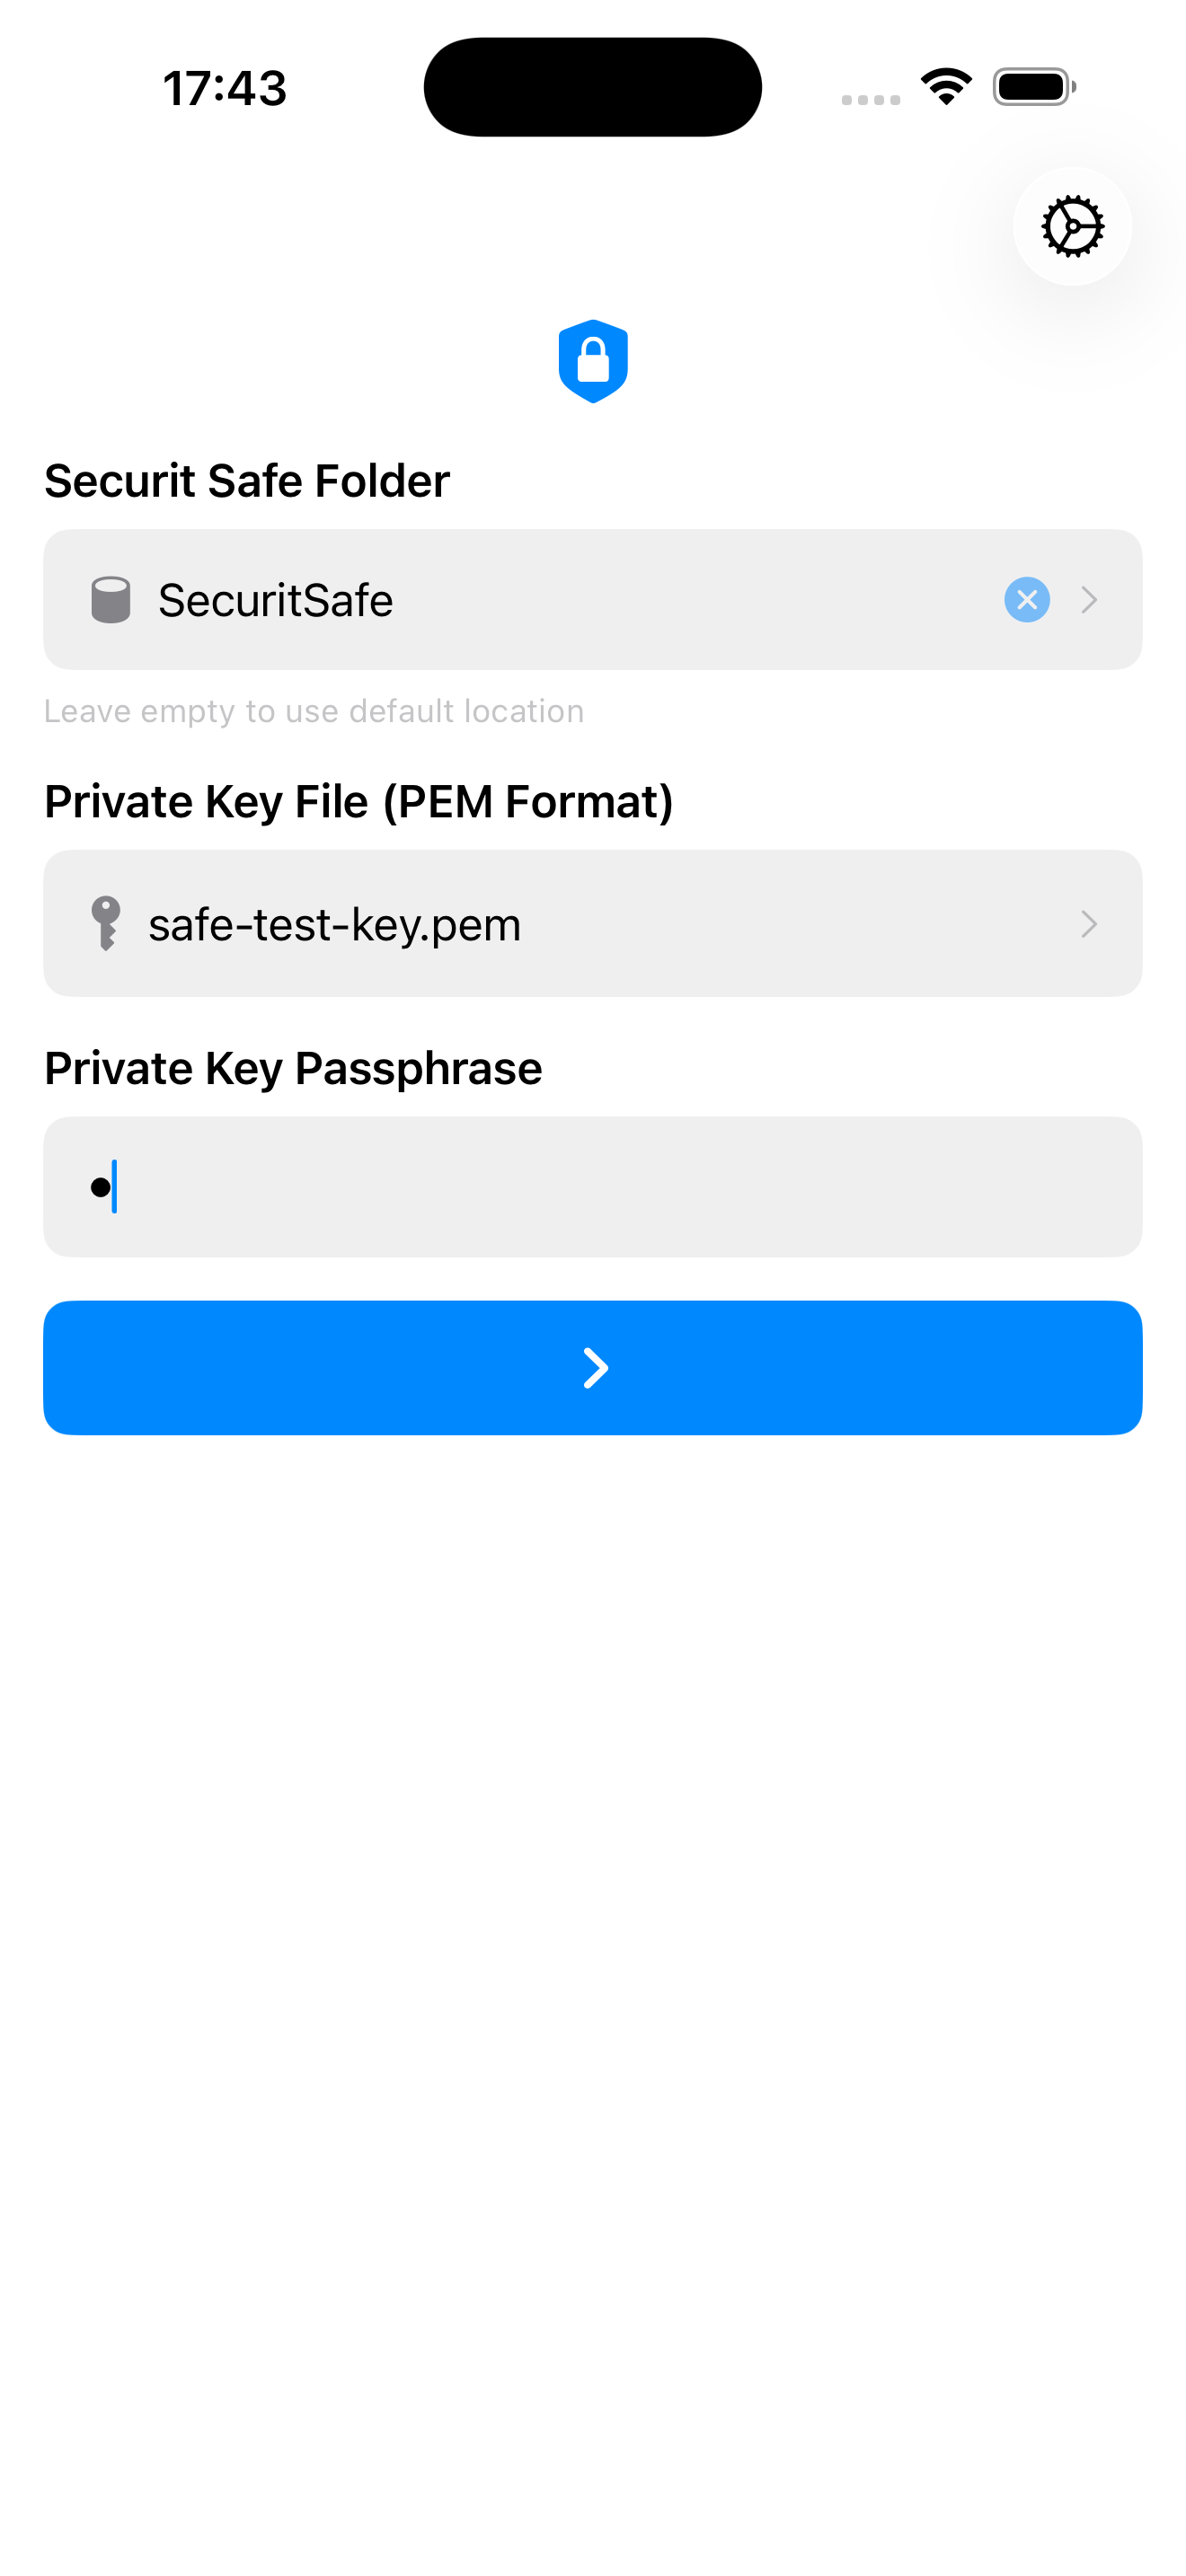
Select Your Private Key File and Enter Passphrase
Tap "Select key file..." and navigate to your ECDSA private key file (.pem format). Then enter the passphrase you set when generating the key.
Key file selected and passphrase entered
Unlock
Tap the arrow button (→) to unlock and enter Securit. If this is your first time, an empty safe will be created.
5. Main Interface
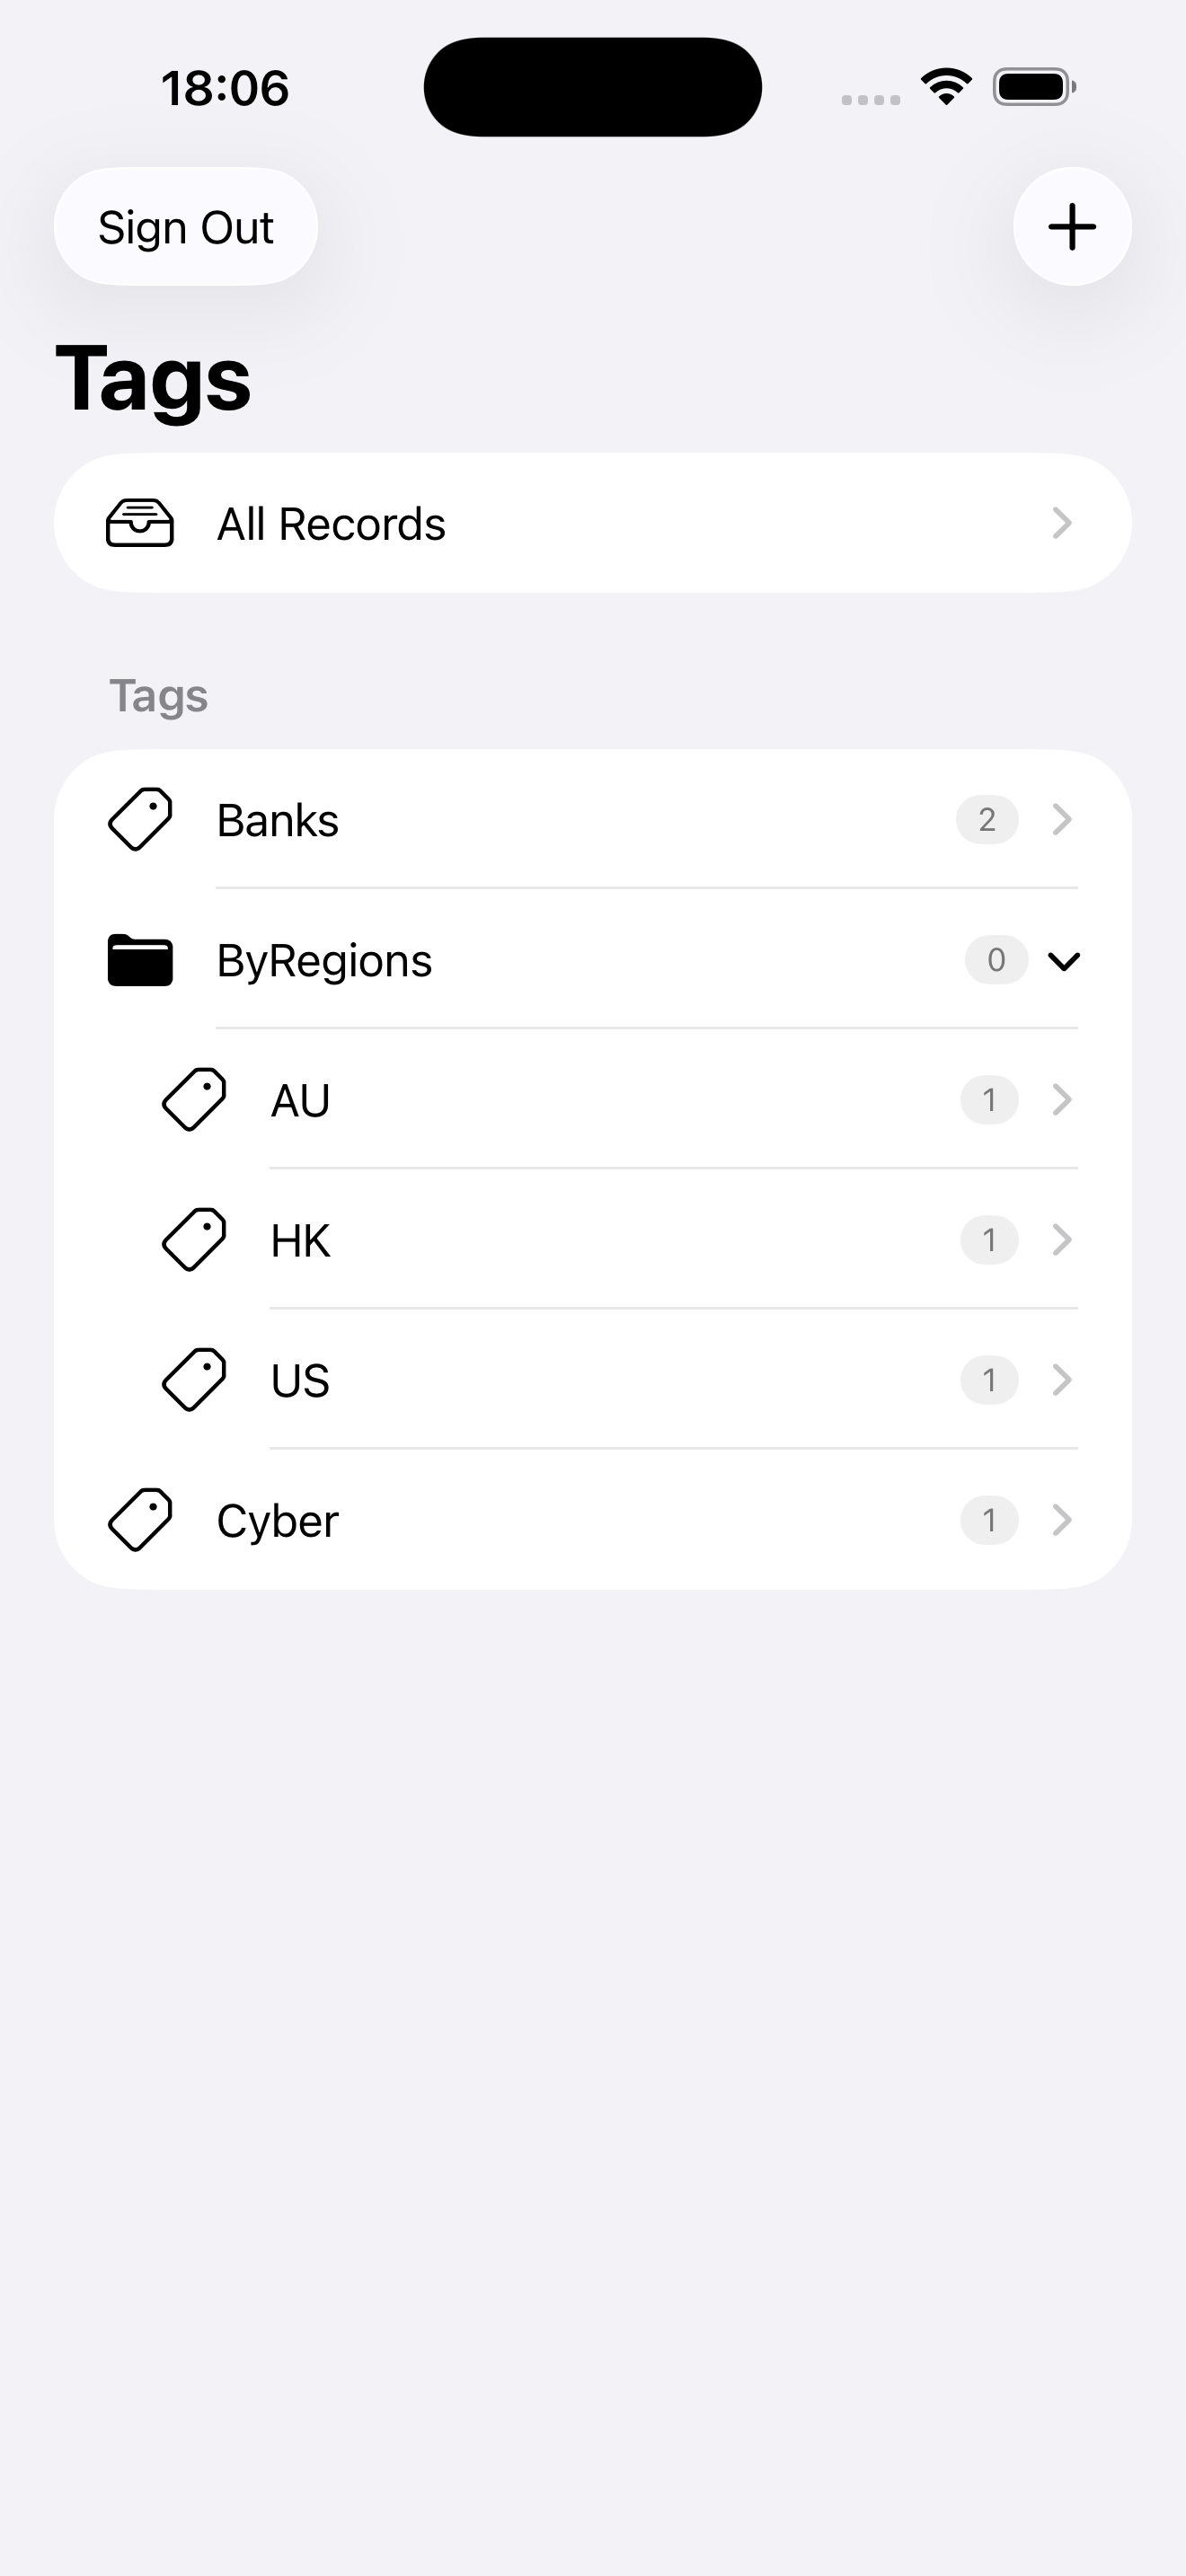
After unlocking, you'll see the main interface. On iPhone, you navigate between Tags, Records, and Details views. On iPad, all panes are visible side-by-side.
Tag list view with hierarchical categories
Navigation
Tags: Hierarchical categories for organizing your records
Records: List of credentials in the selected tag
Details: Full details of the selected record
Toolbar Actions
+ Button: Add new record or tag
Lock Button: Lock and return to the unlock screen
Settings: Access app settings
6. Managing Tags
Tags help you organize your credentials into categories. You can create hierarchical tags using "/" separator.
Creating a Tag
Tap the + button in the Tags section
Or long-press on an existing tag and select "Add Child Tag"
Enter the tag name
For hierarchical tags, use "/" to separate levels. For example:
Work - Creates a root tag
Work/Projects - Creates "Projects" under "Work" (parent must exist first)
Tap Save
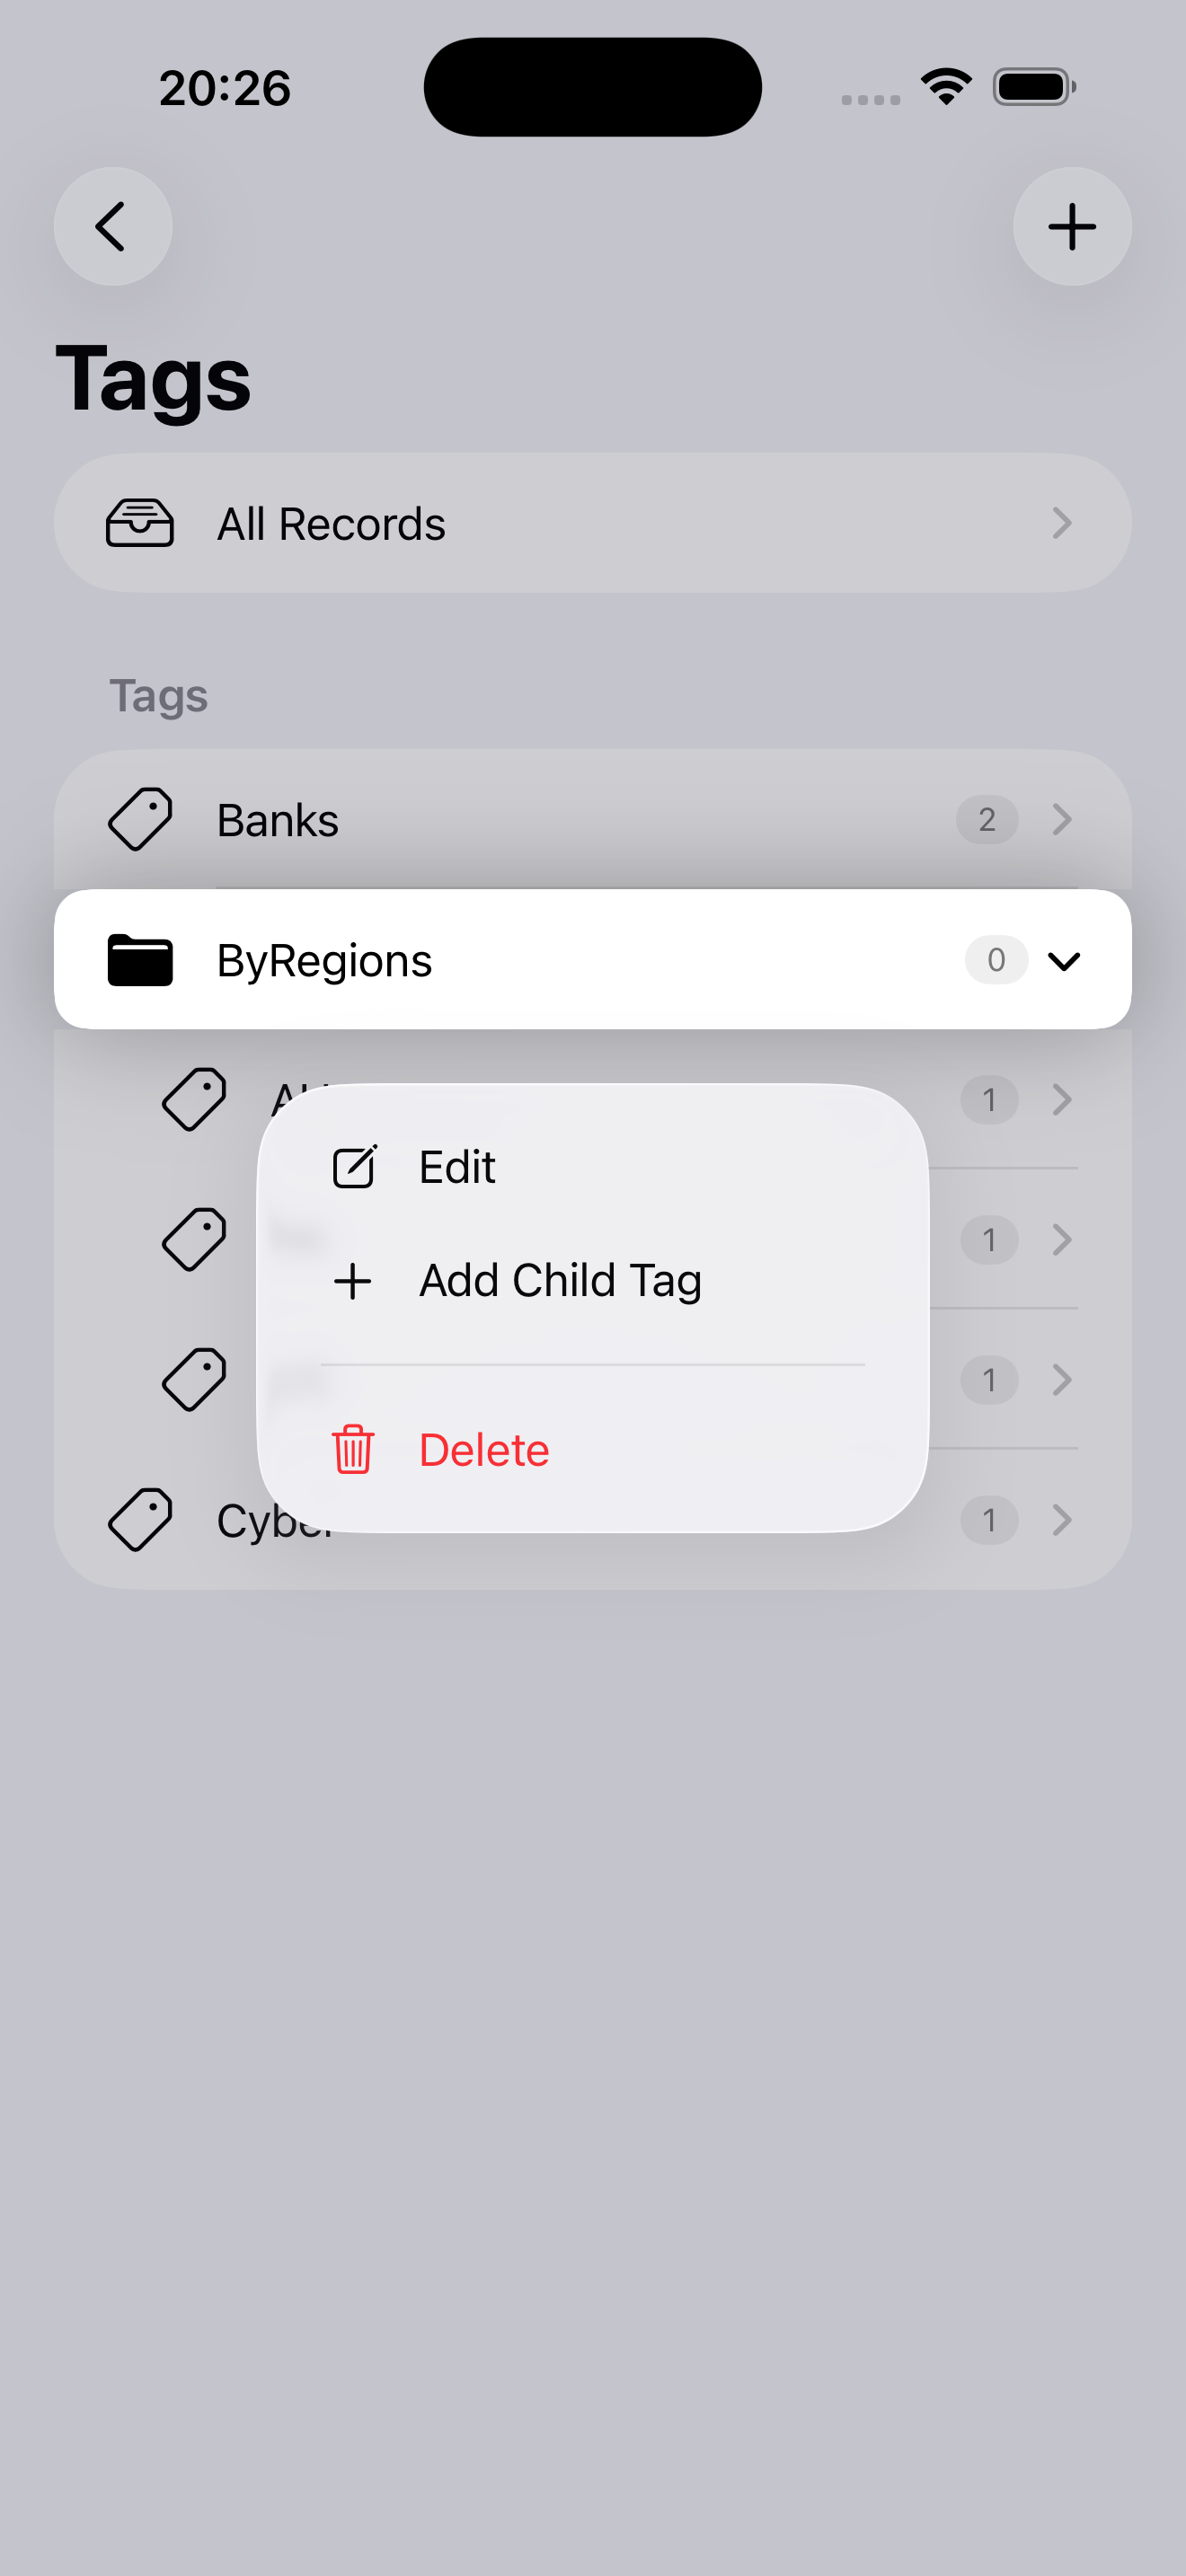
Tag Context Menu
Long-press on any tag to access:
Edit: Rename the tag
Add Child Tag: Create a sub-tag
Delete: Remove the tag (and all child tags)
Long-press context menu for tags
Note: Deleting a tag will also delete all its child tags. Records linked to deleted tags will remain but will lose their tag associations.
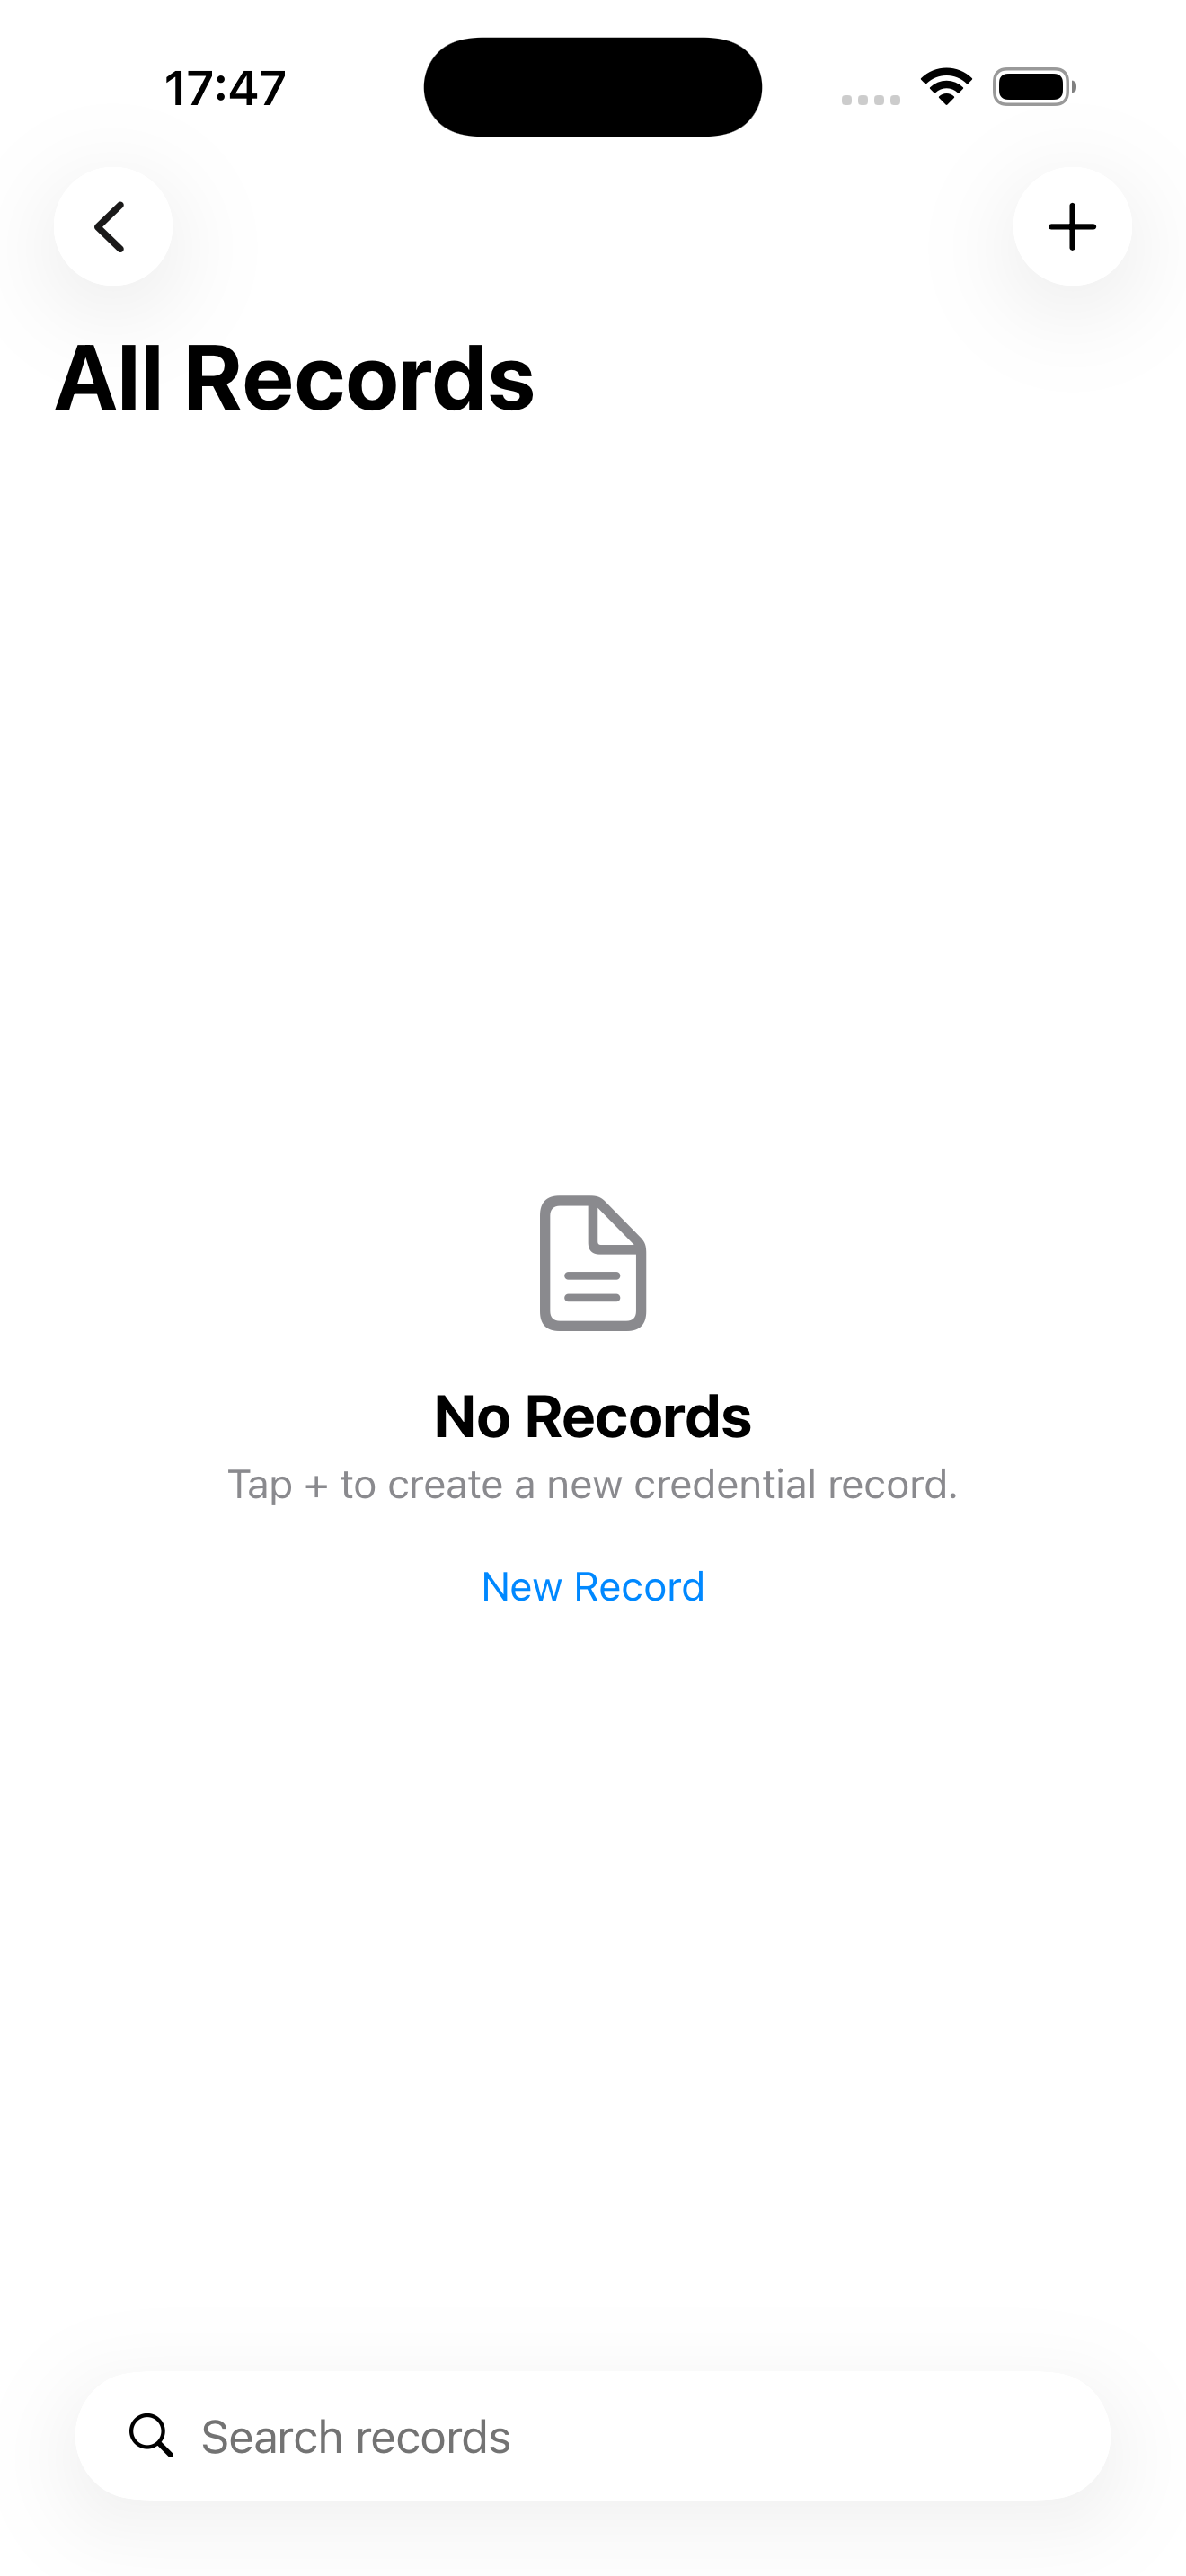
7. Managing Records
Records store your sensitive information like passwords, API keys, into 3 secure notes.
Creating a Record
Tap the + button in the Records section
Empty new record form
Fill in the record details
Name: A unique name for the record
Description: Descriptive text for the record
Secure Notes: Text fields where sensitive information such as user, password, API key, confidential texts, is stored
Tags: Select one or more tags to organize this record
Record form with details filled in
Tap Save
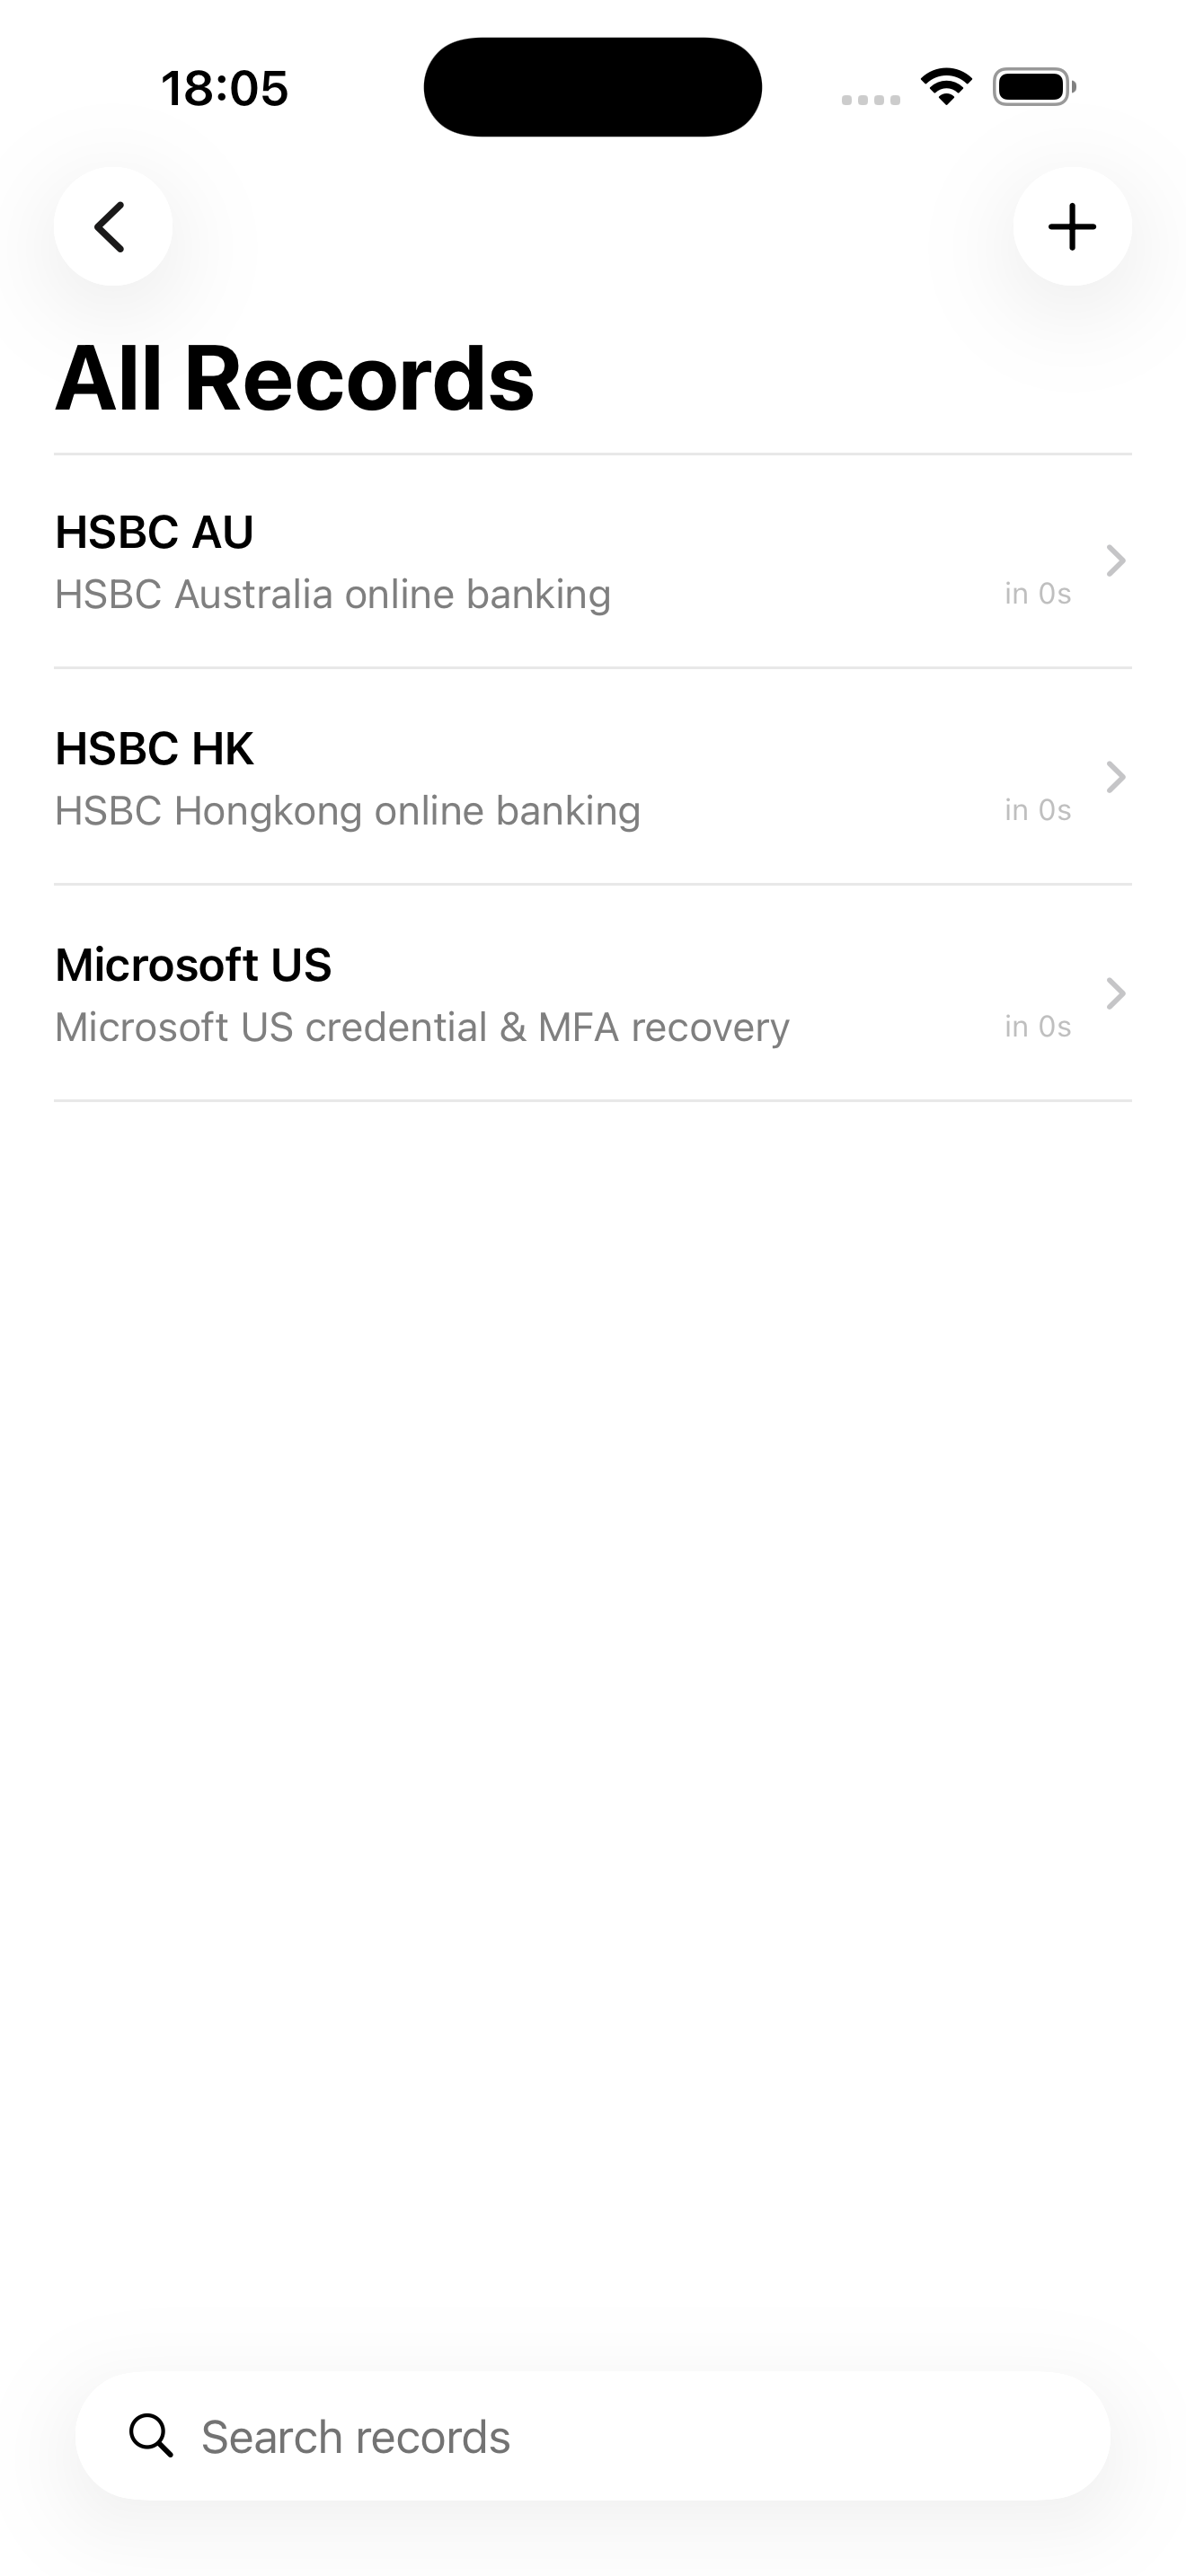
Your record will be encrypted and saved to your safe.
Record list showing saved credentials
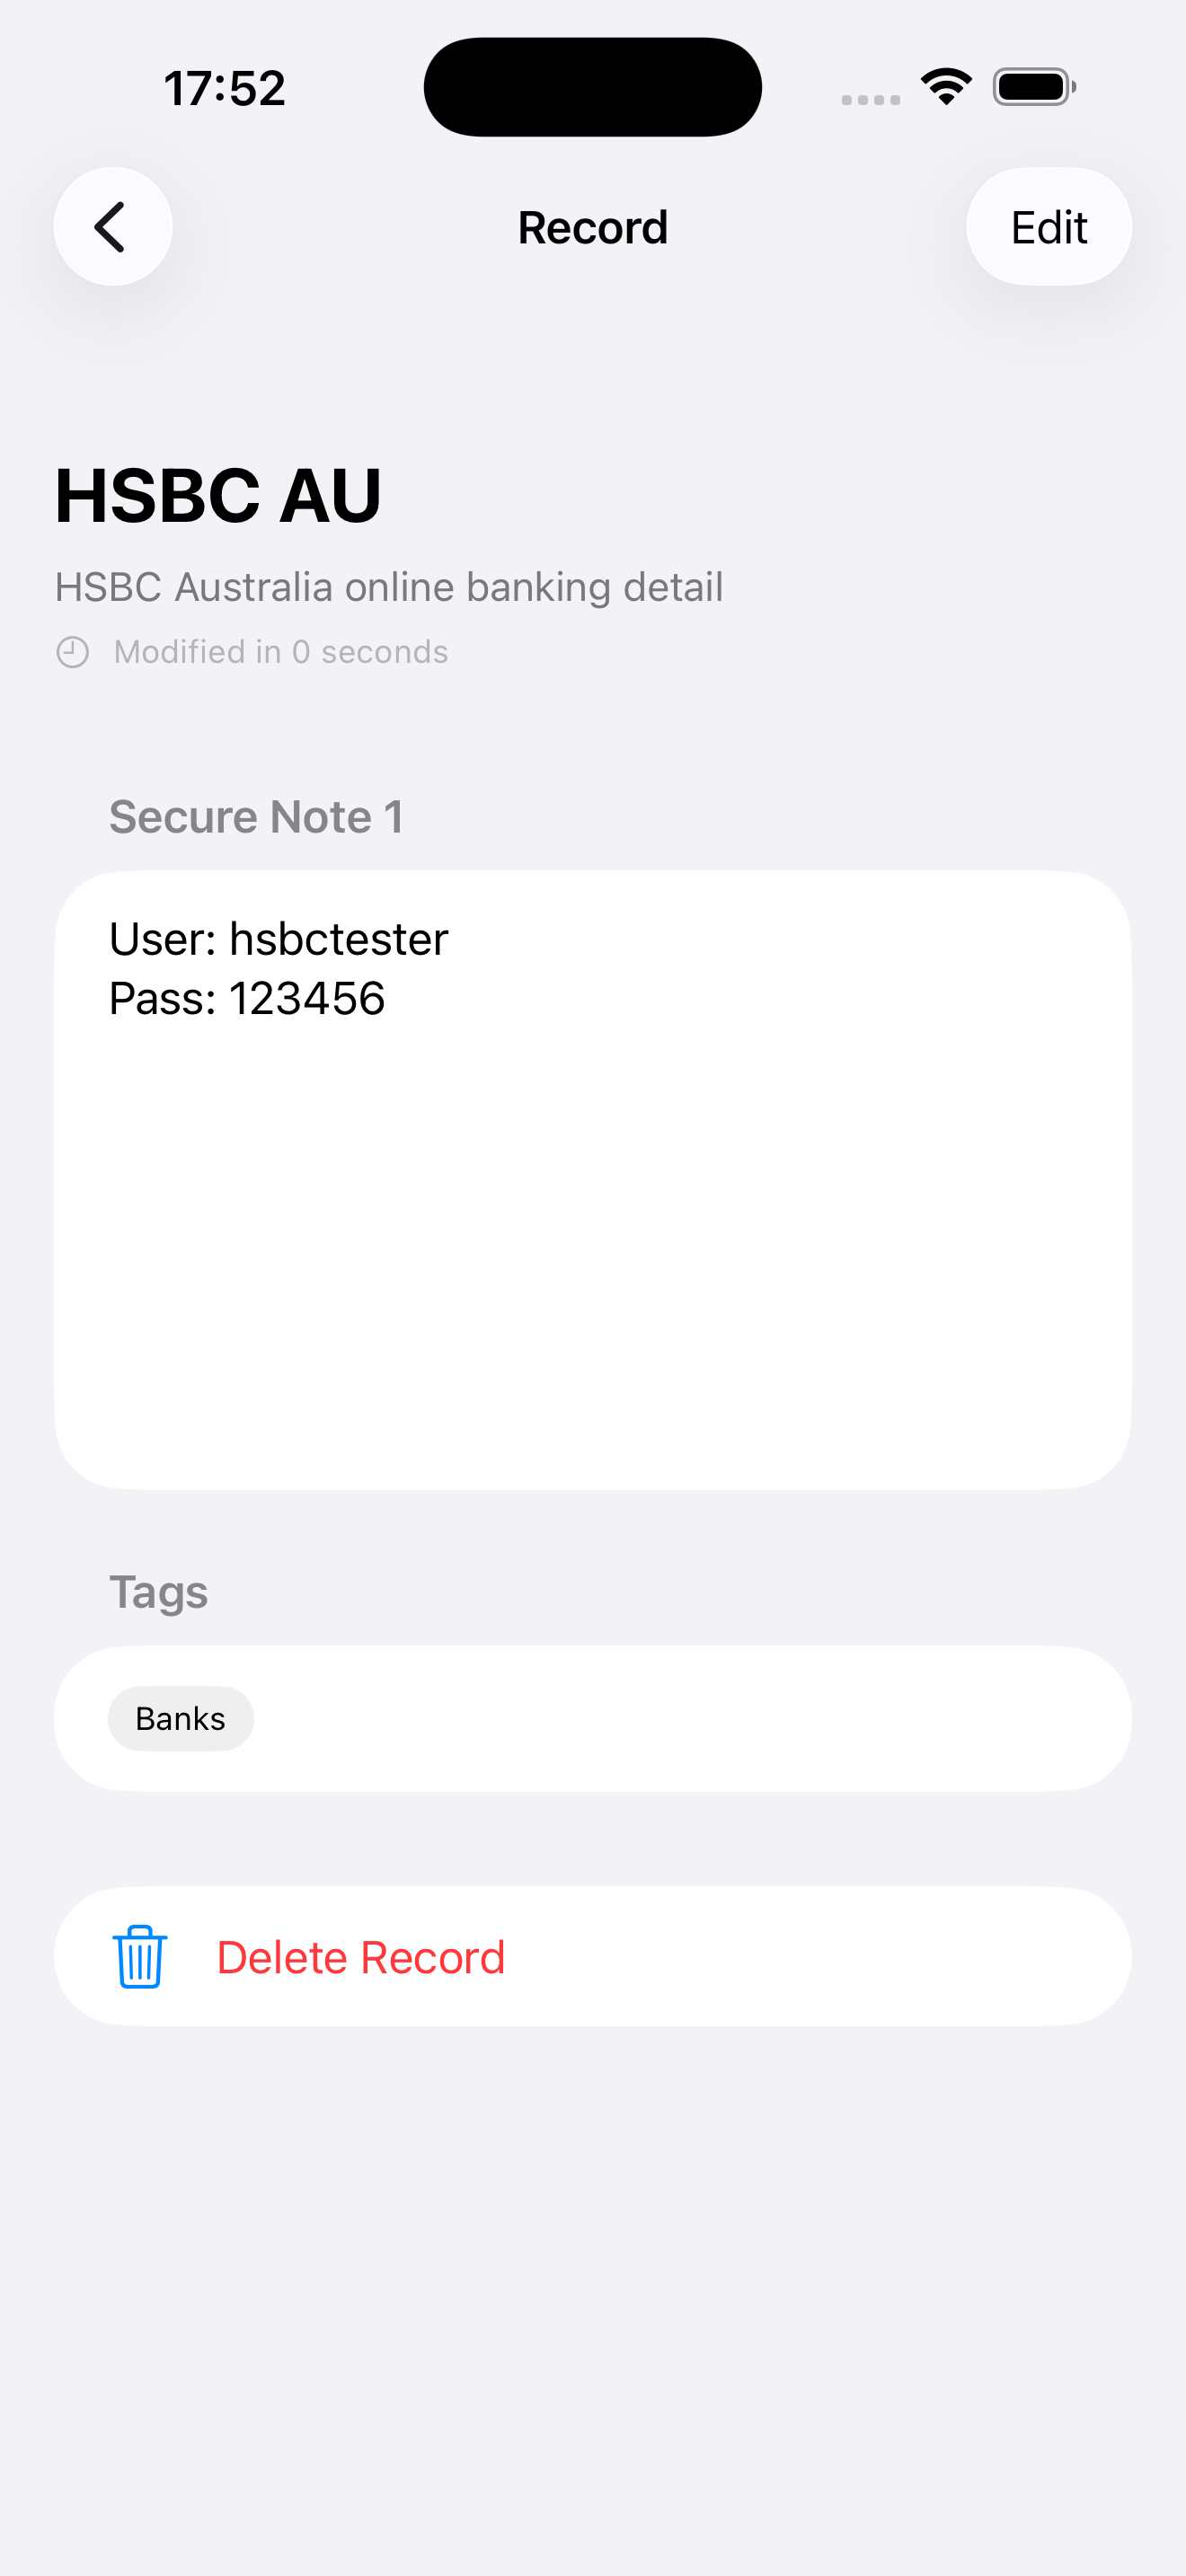
Viewing and Copying
Tap on a record to view its details
Long-press on Secure Notes to select specific text
Editing and Deleting
Tap the Edit button (pencil icon) to modify a record
Swipe left on a record in the list to delete it
8. Using Cloud Storage
Securit supports storing your encrypted safe on cloud services such as iCloud Drive for syncing across devices.
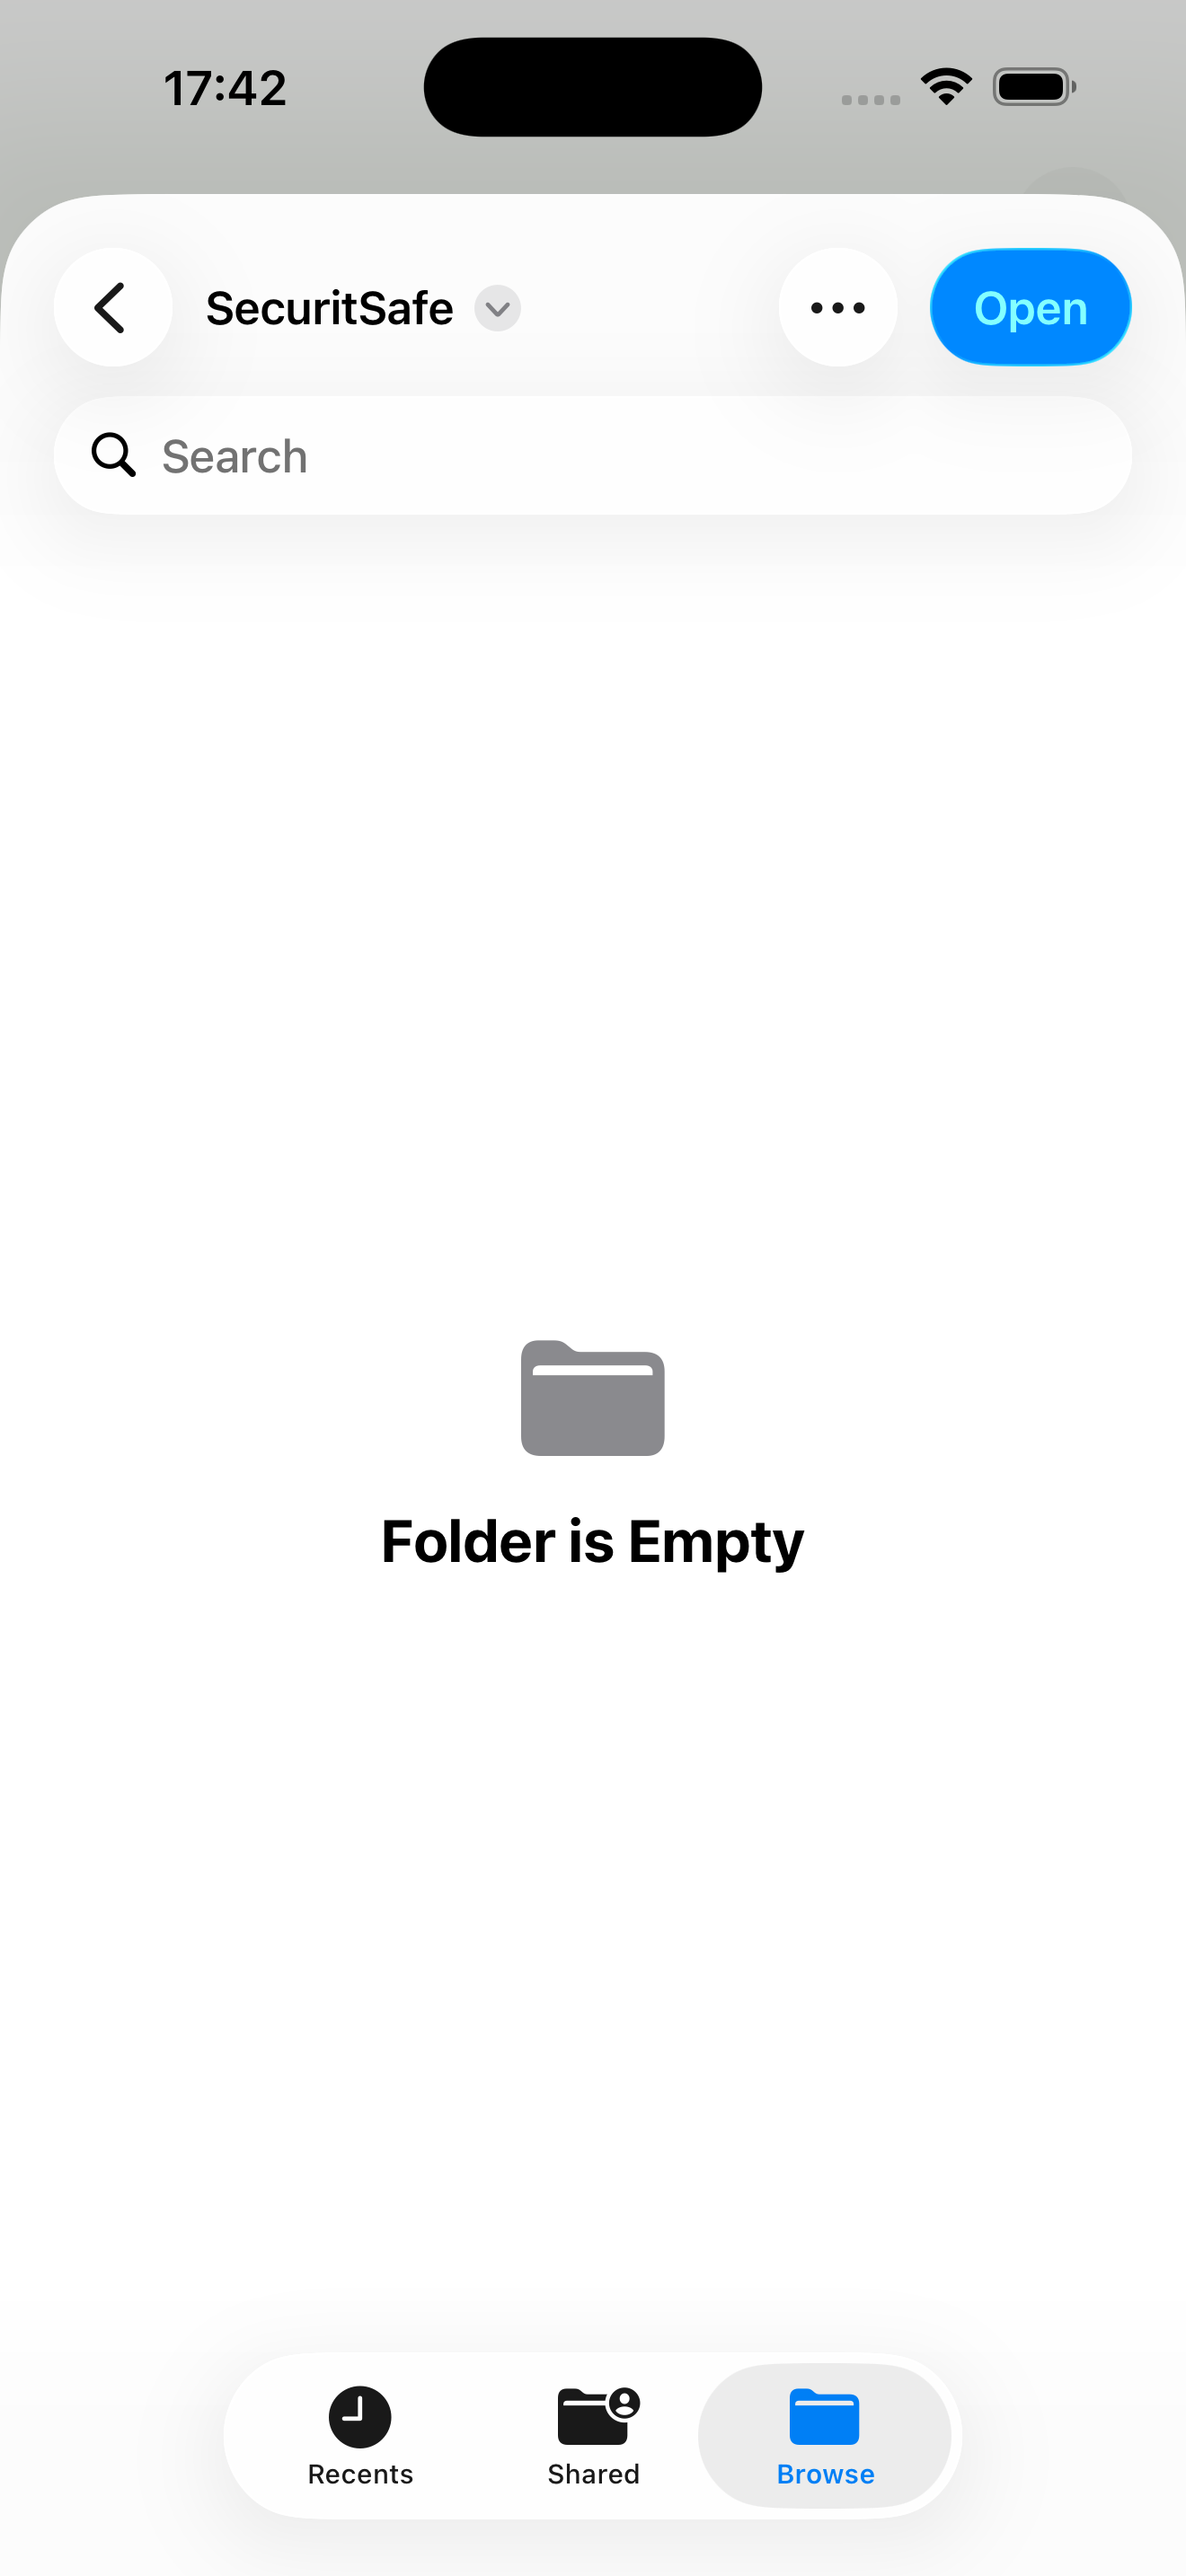
Setting Up Cloud Sync
On the unlock screen, tap "Select folder (optional)..."
Navigate to your cloud storage
For example: iCloud Drive → SecuritSafe
Select the folder and confirm
A database file named db will be created in this folder
Cross-Platform: You can use the same encrypted safe folder with both the iOS Securit app and the Windows Securit application. Just point both apps to the same cloud folder.
Important: Always keep your private key file (.pem) backed up separately. The key is NOT stored in the safe folder and is required to decrypt your data.
9. Troubleshooting
Common Issues
❓ "Signature verification error" when unlocking
Cause: Wrong passphrase or incorrect key file.
Solution: Double-check your passphrase and ensure you're using the correct .pem key file.
❓ Cannot access cloud folder
Cause: The cloud storage app may not support folder selection or allow direct access like local storage.
Solution: iCould Drive is recommended.
❓ "Parent tag does not exist" error
Cause: Trying to create a child tag without creating the parent first.
Solution: Create parent tags before child tags. For "Work/Projects", create "Work" first.
❓ Lost my private key or passphrase
Unfortunately: Without the correct private key and passphrase, your data cannot be recovered. This is by design for security.
Prevention: Always keep secure backups of your private key file.
Getting Help
If you encounter issues not covered here, please check:
Ensure you're using the latest version of Securit
Restart the app and try again
Check that your key file is in the correct PEM format
Securit is provided "as is" without warranty of any kind, express or implied, including but not limited to the warranties of merchantability, fitness for a particular purpose, and non-infringement.
In no event shall the authors or copyright holders be liable for any claim, damages, or other liability, whether in an action of contract, tort, or otherwise, arising from, out of, or in connection with the software or the use or other dealings in the software.
You are solely responsible for:
Maintaining secure backups of your private key file
Remembering your passphrase
The security of your device and any cloud storage you choose to use
Any data loss resulting from lost keys, forgotten passphrases, or device/storage failures
By using Securit, you acknowledge that you understand and accept these terms.